


Übersichtskarte / Fahrzeugstatus V2
Table of Contents
The overview map offers a quick overview on your whole fleet.
Overview
You can reach the overview map via the main menu at positions → locating → overview map / vehicle status. You might also use it as a widget at the dashboard. By default the overview map shows you all vehicles on which you have rights. If your company uses objects or trailers and you have the right for these, you will see them on the map as well. Furthermore you can see a list of your personnel to see which vehicles they are using at the moment quickly. By clicking on vehicles or drivers, you will get further detail information and can start your research.
General
Here we want so explain some of the basic map functionalities.
Menu controls
At the edges of the map you can see multiple menu controls.
| Element | Function | |
|---|---|---|
| Search |  By using the search you can research your fleet. For example you might search for license plates, addresses, driver names or tour numbers. By clicking on the search result, you will jump right into the details of the vehicle, object or driver. | |
| Settings | 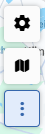 | Click on the gear at top right corner to change general settings. This will be explained in the following section settings. |
| Layer selection | Here you can choose which map type you want to use. Furthermore you can enable additional info like addresses or areas. Changes made here will not be permanent. To change the map layer permanently, please use the settings. | |
| Toolbar | The toolbar offers multiple tools:
| |
| Zoom | 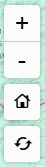 | Use plus and minus to change the zoom level of the map. You can also just use the mouse wheel to do this. |
| Home | Click on the home button to bring all vehicles back to your viewport. | |
| Reload | The overview map reloads every 60 seconds by default. If your use the map inside the dashboard, you are able to adjust this interval. If you want to reload the map at any time while the timer is still running, just click on this button. |
Context menu
Do a right mouse click to open the context menu on the map. This offers you some quick tools.
| Action | Description |
|---|---|
| Route from here / to here | Jump to the routing module to do a routing. |
| What is here? | Check which addresses are nearby. If your are using traffic info and/or truck restrictions, you will also get detailed info on construction sites and restrictions. |
| Who is nearby? | Jump to distance calculation. |
| POI report | Create a POI report. |
| Create order | Create a new order for this address, |
| Create address | Create a new address for the address book. |
Unit list
Center piece of the overview map is the unit list at the left side of the map. Here you can see all vehicles, trailers, objects and drivers.
Menu structure
At the top border of the unit list are its settings.
| Element | Function | |
|---|---|---|
| Change view |  | The unit list can be displayed as list or table. |
| Configure view |  | To meet your personal preferences you are able to configure the view. Read more details at Configure view. |
| Sort |  | By default the units are sorted alphabetically, but you can also sort by their state. |
| Filter |  | The overview map shows all vehicles and objects which you have the rights for. By using filter you can restrict the view to specific units, groups (e.g. your departments) or units with specific attributes (e.g. ignition corrently turned on). If a filter is active, the number of active filters will be displayed as a blue number. |
Configure view

Contents
Open the configurator by clicking on the gear at the unit list. As already mentioned, you can view the unit list as list or table. Each view can be configured individually. For example you could build a small list view for overview and a more complex table view for research.
The unit list can display a wide range of information. For example:
- position data
- driver data
- vehicle settings
- vehicle data gathered via FMS interface or OEM
- temperature data
- information about trailer and towing vehicles
- toll
Welche Werte zur Auswahl stehen, hängt von der Ausstattung Ihrer Fahrzeuge, Ihrem gebuchten Tarif und der Art des Fahrzeuges ab.
The configurator always shows you immediately how the units would like if you save your changes. If you select values which are not supported by your whole fleet, these values will be hidden for these vehicles.
Map symbols
The unit symbols on the map can be changed at vehicle-specific settings.
Change size
By using the little arrow at the right side of the unit list you can collapse the view. If you drag the right bottom corner you can change the size of it. Especially on working in the table view, a greater width might be helpful. You settings will be automatically saved.
Research
The unit list is for getting an overview on the whole fleet. To get more info about a single unit, click on its entry int he unit list to open the detail view on the right side. To find a unit fast, you can use the search at the top. The list will restrict itself while typing.
Detail views

The detail views are for getting an overview of a vehicle, trailer, object or driver. Open the detail view by clicking on an entry in the unit list or on a marker at the map. Detail views offer a lot of information. The views might differ based on the functionalities of the unit, the booked options and your portal rights.
At some places you will see 3 dots behind the headlines. Click on these to get continuative information. Here you can switch to other modules like e.g. the alarm manager, vehicle-specific settings or fleetoverview or even start a report. These will open in a new tab so you are able to return to the map afterwards.
Vehicles and trailers
This view is for information on a vehicle and its current drive. At the header you can see the current driver and trailer. Also you can see some KPIs like the current odometer value, the speed or fuel status. Underneath are mutltiple information blocks.
Base
This is for getting a quick view on the status of the vehicle. This includes:
- current position
- driver
- trailer
- ETA
- toll
Vehicle
This is about technical data of the vehicle, for exmaple:
- meta information like its VIN or manufacturer
- some FMS values
- telmetry data
- temperature data
Driver
Here you can see the shift data of the registered driver. If available you will also get data for the co-driver.
Positions
Here you can research the last drives of the vehicle.
Objects

At objects you will see the registered Beacon MAC and/or NFC tag. Underneath you see multiple information blocks.
Base
The current position of the object is displayed. You will also see which driver or vehicle did see it last. Underneath all attributes of the object will be displayed with their current values.
Positions
Here you can research the objects positions.
Driver

The driver view is being shown if you choose as driver which is currently not logged in on any vehicle. Analogous to the vehicle view you can see shift data here. If the driver is currently logged in, the detail view of the vehicle will open.
Settings
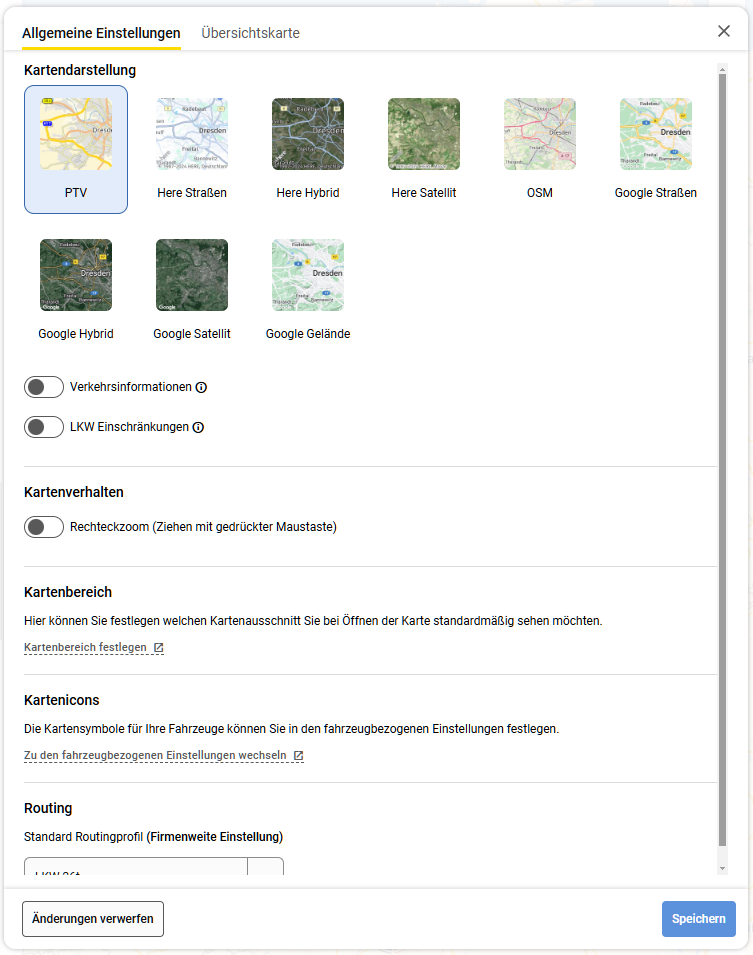
You can reach the settings by clicking on the gear symbol at top right corner. You can also use the main menu via Administration → Map → Map settings.
At the settings you will find general settings which affect all map types at YellowFox, but also specific settings for the overview map. If you change and save settings, the portal will be reloaded afterwards.
General settings
Map illustration
Here you can choose which map type you want to use by default. Base on the selected map type you might also add traffic information or truck restrictions. These information are not available for all map types.
Map behaviour
Select if you want to use the rectangle zoom by default. You can also enable it temporarly via the toolbar.
Map area
By default on load of the map all markers will get focused. You can choose a specific map area as an alternative. In this case you will always start at this area. Use this to focus e.g. your company areal.
Map icons
Map icons of vehicles can be set via vehicle-specific settings.
Routing
This settings is admin only. Routing profiles are important for the routing module as well as calculation of toll costs. The default routing profile is being used for all vehicles which have no profile set for themselves.
Overview map
Hide inactive vehicles
By default you will see all vehicles whose positions are not older than 2 months. This hides vehicles which are currently not in use. You can change this setting if you want to. "Never" means that old positions will always get displayed. Still the positions will be 2 years old at max, as YellowFox deletes them afterwards according to usage terms.
Map illustration
Here you can set how the markers are getting displayed on the map.
Default filter settings
Set here if you want to always start with a default filter. This filter will only get used if you open the overview map via the main menu. If you use the map inside the dashboard, you need to set the filter while creating the dashboard.