...
| Sv translation | ||||||||||||||||||||||||||||||||||
|---|---|---|---|---|---|---|---|---|---|---|---|---|---|---|---|---|---|---|---|---|---|---|---|---|---|---|---|---|---|---|---|---|---|---|
| ||||||||||||||||||||||||||||||||||
Here you can create, edit and manage your user-defined tour workflows. To use this module your company has to have unlocked the module "tours" and you have to have the portal right "orders/messages configure".
What is a workflow?A tour consists of destinations which should be targeted by the driver and shipments, which are to be executed. If you send a tour to a display, it will arrive as a simple mass of data, without any rules how this data is to be handled. Workflows allow you to define work sequences and therefore faciliate your drivers work. A workflow consists of a set of status messages which are dependant on each other. For example you could define that the 'tour end' status can only be pressed if the 'tour start' status was pressed before. Furthermore you are able to define an execution order for destinations and shipments and bind further actions to triggering a status. A workflow is bind to a single element of the tour, i.e. a tour, a destination or a shipment. A workflow is universally usable, you do not have to set a type of element for it. Assigning a workflow is not mandatory. You might assign a workflow to just some elements and leave others empty. Since workflows define own status messages, the default tour status configuration of the element to which the workflow is assigned, will be overwritten by it. StatusThe central element of a workflow are status messages. We differ between display status, these are status messages which can be pressed by the driver on the display, and system status, which are generated automatically, e.g. on starting the navigation. You can add an arbitrary amount of status to your workflow. These are defined like your default order- and tour states. You can even use those a templates. But please notice that changes to your default configurations, will not affect your existing workflows! ActionsActions can be bind to a status. These will be triggered when the status was pressed on the display resp. the system status was triggered automatically. The following actions are available:
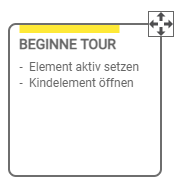
DependenciesA dependency marks the order of two status messages. If there is a dependency from status A to status B, this means, that status B will only be available for selection on the display as soon as the driver has pressed status A. There can be an infinite amount of dependencies from a status to others. A single dependency is always unidirectional, but you can define loops. Status which should be shown initially, need a dependency from the start node. Status which own the action 'set element to done' automatically own a dependency directed to the end node as well. If a status does not have a dependency to another status or the end node, the current element can not be set to done from here on. Relations of workflows to each otherThe workflows of the different tour levels are independent and remain in their current state on switch to another tour element. An example: In your tour workflow the first state is "tour start". On click the first destination is opened. After finishing the destinations, you return to the tour level. The current state of this is still after "tour start", you do not restart the workflow. Workflow overviewInitially a list of all your workflows is displayed. Click on a name to open a preview. Click on edit to start editing. You might also directly delete this workflow by pressing delete. Via the search bar on top left, you can filter the list by the workflows names. Create/edit workflowTo add a new workflow, press create. The editor will start with a start and end node. These nodes can be dragged but not edited. On the right side you can see the meta information of your workflow. Here you can set a name and description. The name has to be unique among all your workflows. Furthermore you can set the execution order. A free order means that all child elements of the element to which this workflow is bind, can be executed in an arbitrary order (e.g. the workflow is assigned to a destination, then the shipments can be executed in any order). If a workflow is strict ordered, then the child elements have to be executed in the given order (e.g. the workflow is assigned to a tour, then destination 1 has to be done first, then 2 and so on). Below you will find the option delete workflow to remove your workflow. Create statusTo add a new status, click on add status on the left side of the toolbar. Click on the arrow to expand the list of pre-defined order- and tour states of your configurations. Click on of those to load it as a template into your editor. To move a status, click on it first. After that you can drag-and-drop it by the icon in the top right corner. Clicking the status will also unfold its detail view on the right side. Here you can see all its meta information. To edit this, click on the button edit. A new window will open. Click on apply to apply your changes and refresh the main view. A status is defined by an ID, an optional ident, a german status text and an arbitrary amount of translations. Furthermore you can set a color. This is only relevant for the editor and will not be sent to the display. To change the color, click on the circle. You can also do this directly from the side bar. You can assign properties to your status:
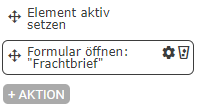
Attach actionsBelow this you will see the attached actions. To add a new action, click on +action. A new window will open. You need to set an action type (see above). If you have chosen 'set child elements to done' or 'trigger consecutive status' you will have to define a status as well, which should be set in this moment. This does not affect display output, but can be accessed via interfaces. If you have chosen 'open form' you need to set an user-defined form. Besides 'trigger consecutive status', all action types can only be attached once per status. Click on apply to apply your changes and refresh the main view. To edit an existing action, hover it with your mouse and click on the gear icon or click on the bin to delete it. You can also change the order of your actions by grabbing the icon on the left and drag-and-dropping it to your desired position. By clicking delete status you can delete the status and all its dependencies.
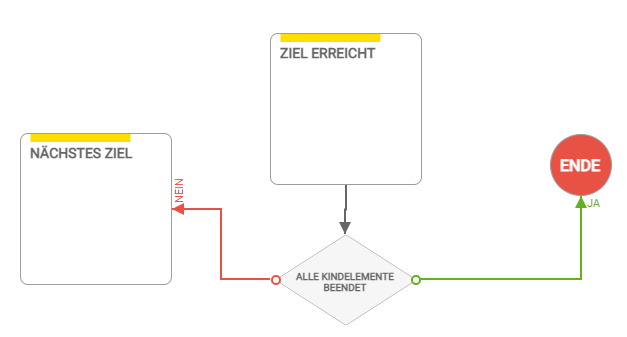
Add dependenciesTo create a dependency between two status, you need to activate the line tool first by clicking on the arrow icon in the toolbar. Now click on the status from which your dependency should start. It will be highlighted. Now select the target. The line will be drawn automatically. The detail view of your new dependency will open on the right. You can also open this view by clicking on an existing line. Here you can find the option delete dependency to remove this line. Dependencies can be created from any status in an arbitrary amount, they are directional. The start node can only be the start of a dependency, the end node can only be the target. You are not able to draw a dependency directly from start to end. To edit the intermediate points of the automatically generated line, select it first. Drag and Drop one of the highlighted points to move the line. To delete an intermediate point, just click on it without dragging. The manually set points will be connected automatically. Add conditionsA condition is a decision path. To create a new condition, click on add condition at the toolbar. Conditions are similar to status: You can move them, you can view detail info and create dependencies. What is special is that you can set a type. This defines the condition that has to be met or not be met in order to go a specific path in the workflow. The following types are supported:
Dependencies which are linked from a condition to somewhere else own a type. To set it, click on the line and go to the detail view on the right. The type defines wether the follwoing state should be reached on meeting the condition or not meeting the condition. Sorting orderThe sorting order defines in which order simultaneously reachable states should be shownon the display. You can reach this option via the meta view of the workflow, here you will find the button edit sorting order. A new window will open. One below the other you will see all states and their corresponding follow-up states. You can edit the order via drag-and-drop for each step. Click on apply if you are done. SavingIf you are done with editing click on save at the top. By default this will overwrite the old data if given. You can also save your workflow as a copy. Your copy has to have a new name. Before saving the workflow, it will be validated. If there are any problems, these will be displayed. You can save the workflow nevertheless. Please notice that unwanted behaviour might occur if such a workflow is sent to a display. Via cancel you can stop editing without saving.
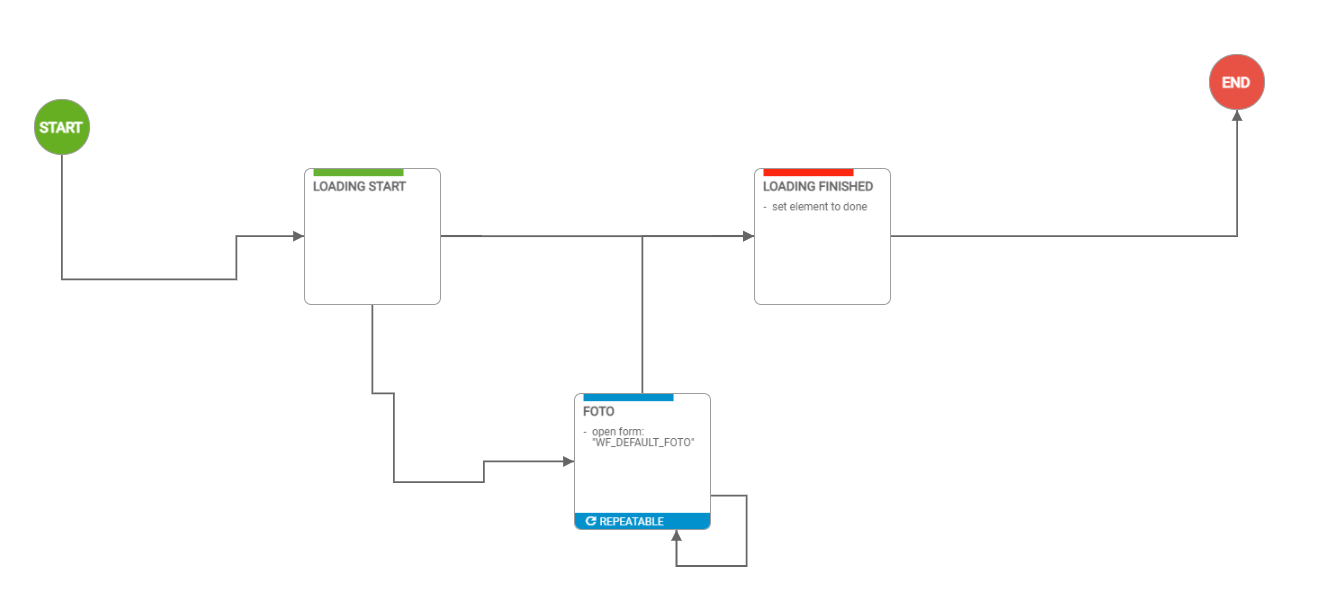
Use workflowsCurrently workflows can only be used via TourWS. You can find the documentation here. Workflows can only be used on displays with fleet app version 4.0.6.5 and beyond. ExamplesThe possibilities in using workflows are infinite. Here are some examples how a workflow might look like. Loading
Load exchange
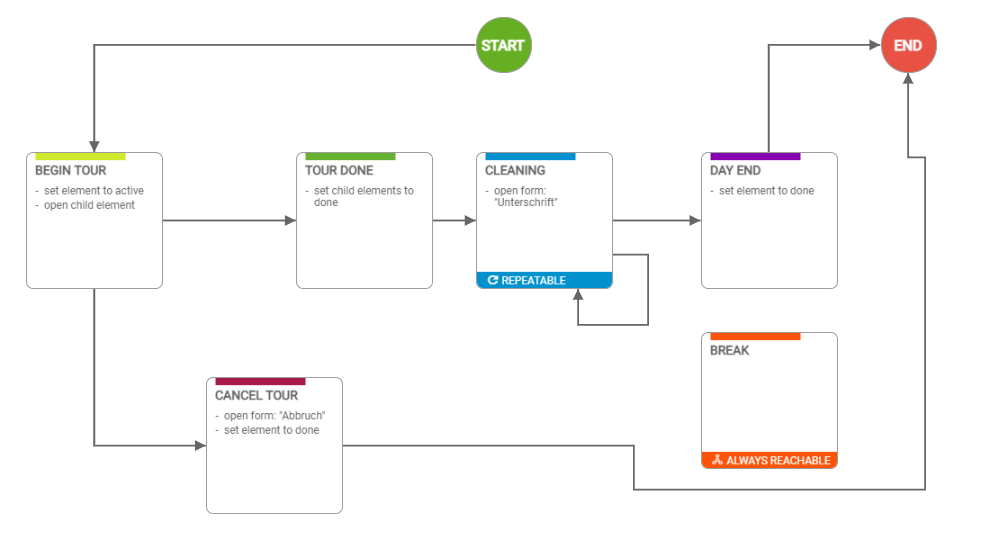
Day tour incl. cleaning
|