...
| Sv translation | ||
|---|---|---|
| ||
First stepsBefore you can start with the setup of your terminal, you need to connect. The order of making connections to power and network depends on your desired way of using the terminal. Via LANPlease connect the network cable before you connect the terminal to power. Via WLANProceed with chapter Power supply, please. Via GSM / GPRSInsert the SIM card first. Remove any connected power supply first! Remove the 4 screws from the corners of the devices bottom. Open the device. Insert the SIM into the card holder, you will find on the backside of the board. Close the terminal again, and don't forget these 4 screws! Do not use too much power when tightening the screws, you might damage the units case. PIN der SIM-KarteRight now you cannot use the terminal with SIM cards protected by PINs. Therefore you will have to disable the PIN question on your SIM card. If you cannot, please set the PIN to "0000". Power supplyPlease use the power supply that was delivered along with the Terminal. DO NOT USE ANY OTHER POWER SUPPLY! Connect the supply to 230 Volts, 50 Hz. The device will boot now, give it a few minutes to finish this.
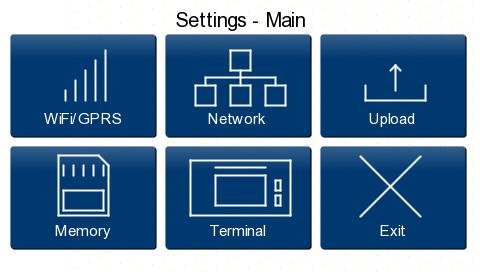
To use the terminal, you will have to do some settings first. SetupTap on the lower left corner of the display. A menu will appear, asking you for the devices PIN. The default PIN is "0000". Insert the PIN and tap Continue.
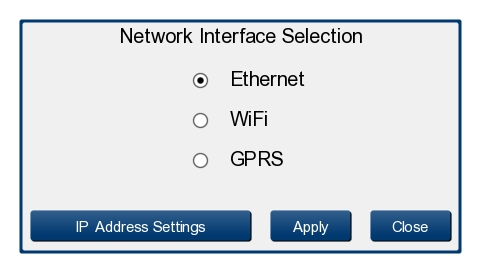
Just proceed with "Network". NetworkLANif you want to use LAN, the cable was connected already. You have to make decision now: dynamic or static addresses. Please ask your IT staff to receive help with this. Click "Network" in the Main menu.
Please enable the option "Ethernet". Click "Apply". next, Click "IP Address Settings".
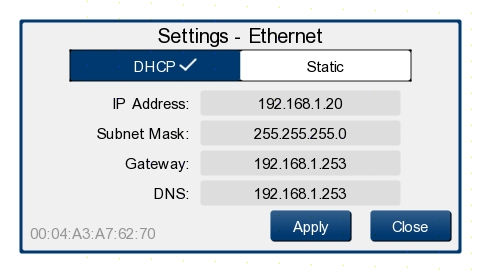
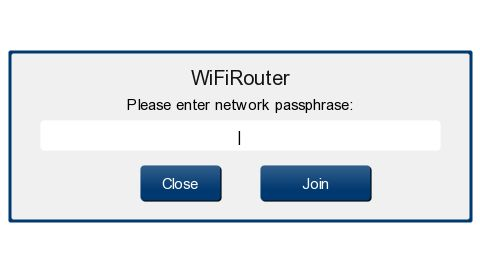
Please make the settings you negotiated with your IT department. Click "Apply", and then leave the Network settings with "Close". WLANIn the main menu, press "WiFi". Select the right network, and enter the passphrase.
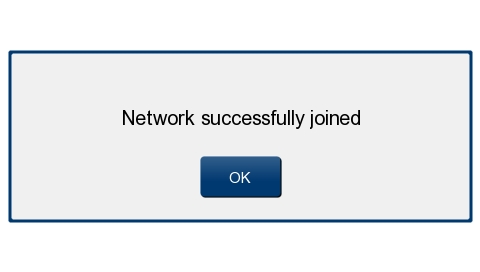
Click "Join".
leave the Settings with "Close".
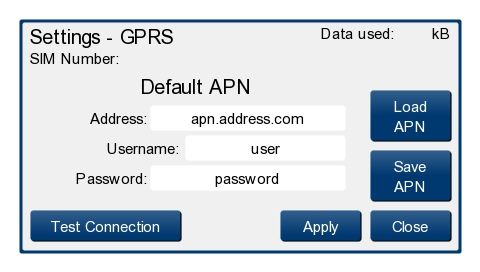
GSMIn the main menu, click "GPRS". Provide the necessary data in the following screen.
Most important, make sure the settings for Address, Username and Password are correct. Click "Appl", and after receiving the confirmation, click "Close.
Data transferIn the main menu, click network again.
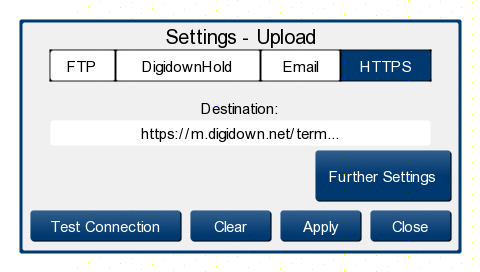
Select the right option, based on your desired way of using the device, tap "Apply" and "Close" again. In the Mmain menu click "Upload".
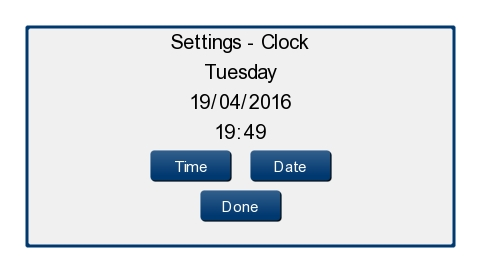
Tap the HTTPS option. Tap on destination. Provide the following address map.yellowfox.de/external/digidown/api.php Click "Back". Click "Apply". After you received the confirmation, tap "Close". Set date and timeIn the main menu, click "Terminal", then "Clock".
Set both Date and Time to correct values. By tapping "Done" you can get back to the Admin menu. Upload frequencyYou could change the upload frequency of the terminal, even it is not recommended to switch it away from "when available". To change this, enter the "Upload" menu from the main menu.
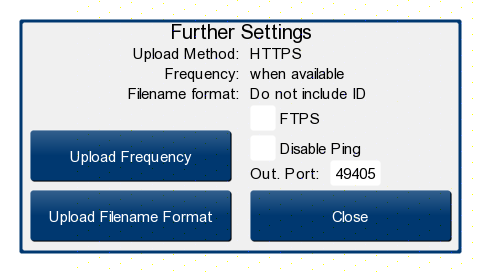
Please press "Further Settings".
In "Upload Frequency" you could make your changes. "Disable Ping" has to stay enabled!
Just "Apply" and then "Close" this to save your changes. Upload file formatIn the main menu, enter the "Uploads" area:
Enter "Further Settings":
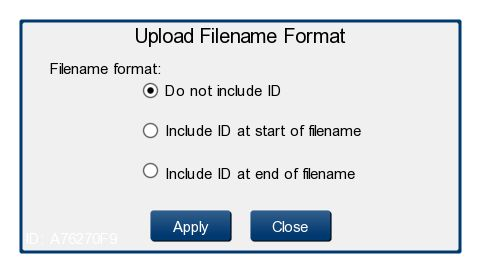
Enter "Upload Filename Format". "Disable Ping" has to stay enabled!
Make sure you have activated "Do not include ID". Tap "Apply", then "Close".
|